
So you’ve got the new RCBS Rebel press. Good choice. It’s a solid piece of machinery that promises to be the centerpiece of your reloading bench for years. But here’s the thing: its legendary performance is completely dependent on how you mount it. A wobbly bench or improper hardware will undermine everything this press is designed to do. Let’s get it set up right.
Before we dive into bolts and bench tops, consider your workflow. A clean, organized space is key. For this project, many professionals recommend using the Frankford Arsenal Platinum case prep center. It consolidates several messy tasks into one tidy station, freeing up valuable bench space right next to your new press. Its a logical pairing for a serious setup.
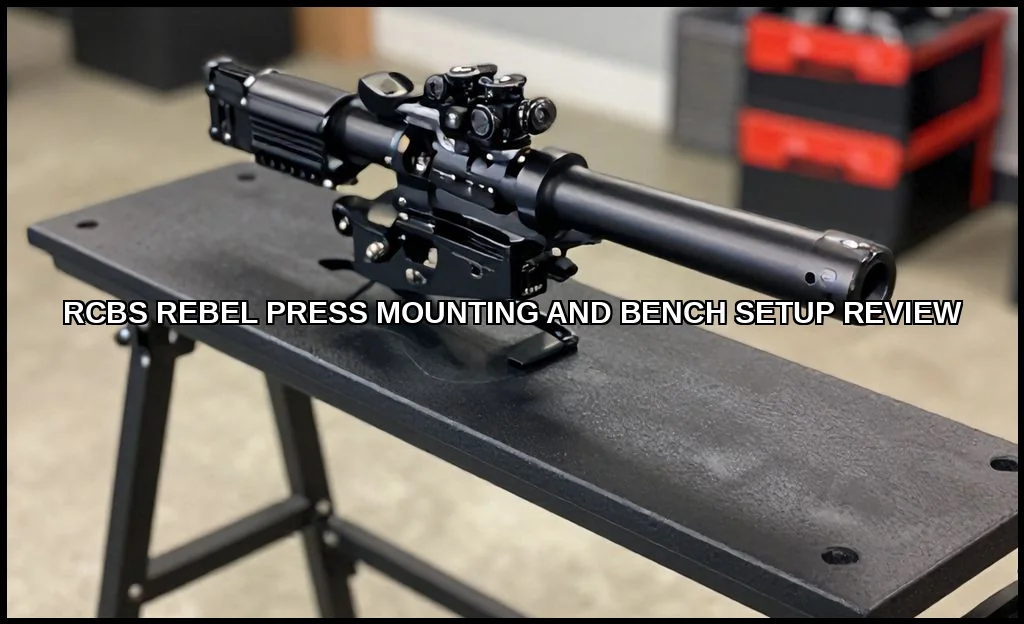
Getting Started: Unboxing and First Impressions
The Rebel arrives with a satisfying heft. You immediately notice the massive, one-piece cast-iron frame. It’s built to eliminate flex, which is the enemy of consistent ammunition. The compound linkage is smooth out of the box, and the spent primer catch system is a notable upgrade from older designs. Your first task isn’t pulling the handleit’s planning the installation.
Step-by-Step: RCBS Rebel Press Mounting Instructions
This isn’t a “slap it on and go” operation. Precision here pays dividends in smooth operation later. The goal is absolute rigidity.
Gathering Your Hardware
RCBS provides basic hardware, but I always recommend an upgrade. The provided bolts work, but for a permanent, rock-solid install, you’ll want better.
- Bolts: Use 3/8″-16 UNC grade 5 or grade 8 bolts. Length depends entirely on your bench top thickness. A common question is what size bolts to mount RCBS Rebel. You need enough length to pass through the bench, a large washer, and a lock washer, and still have enough thread for a nut.
- Washers: Use large, flat washers (fender washers) under the bench. They distribute the immense clamping force and prevent damage to the wood.
- Lock Washers & Nuts: A split lock washer and a nylon-insert lock nut (nyloc nut) are mandatory to combat vibration loosening.
The Mounting Process
Follow these steps for a flawless RCBS Rebel press installation.
- Positioning: Place the press on your bench. Consider your stance, the swing of the handle, and access to your powder measure and scale. The handle should have a full, unobstructed arc.
- Marking Holes: Use a center punch to mark the four mounting holes through the press base. Remove the press and drill pilot holes slightly smaller than your bolt diameter.
- Through-Bolting: This is the non-negotiable best practice. Insert the bolts from the top, through the press and bench. Under the bench, add a flat washer, lock washer, and tighten the nut securely. Through-bolting provides far superior stability compared to lag screws.
- Final Torque: Tighten the nuts evenly in a criss-cross pattern. You want it firmdon’t strip the threads or crush the bench top, but eliminate any play.
Solving RCBS Rebel press mounting problems often comes down to skipping step 3 or using undersized hardware. Don’t cut corners.
Bench Requirements: Building a Foundation for Stability
Your press is only as stable as what it’s bolted to. This is where most hobbyists underestimate their needs.
Strength and Thickness
Flex in the bench translates directly to inconsistency in your ammo. For the Rebel, you need mass.
- Minimum Bench Top Thickness: 1.5 inches of solid hardwood (like maple) or laminated plywood. 2 inches is better. Anything less will flex and vibrate excessively.
- Construction: The bench frame must be robust. Use 4×4 legs and sturdy cross-bracing. Consider anchoring the entire bench to a wall stud for lateral stability.
- Weight: A heavy bench is a stable bench. Don’t be afraid to add sandbags or weight inside the frame if it feels light.
Wondering about the best bench for RCBS Rebel? It’s one you build (or buy) with overkill in mind. Many opt for a dedicated, massively built rcbs press stand if permanent bench space is limited. They’re designed specifically for this purpose.
Ergonomics and Height
The correct reloading press height prevents fatigue. A common rule: with the handle at the top of its stroke, your forearm should be roughly parallel to the floor when you grip it. This might mean your bench surface is lower than a standard workbench.
| User Height | Suggested Bench Surface Height |
|---|---|
| 5′ 6″ – 5′ 10″ | 34″ – 36″ |
| 5′ 10″ – 6′ 2″ | 36″ – 38″ |
| Over 6′ 2″ | 38″ – 40″ |
These are starting points. Your body mechanics are the final judge.
Setup Tips for Peak Performance
With the press mounted rock-solid, fine-tune the details.
Primer System Setup
The Rebel’s automatic spent primer management is excellent. Ensure the tube is fully seated and the collection bottle is secure. A small piece of tape on the tube connection can prevent it from backing out during vigorous use.
Lubrication and Break-In
Apply a drop of oil to the pivot points and the ram. Work the handle through its full range 50-100 times with no die in place. You’ll feel it get smoother. This wears in the mating surfaces evenly.
Die Alignment
Use a quality die lock ring and tighten it securely. The Rebel’s “Floating Tool Head” is designed for near-perfect alignment, but you must give it a consistent, square mounting surfaceagain, that comes back to your bench and your how to properly mount an RCBS Rebel press diligence.
Final Review: Living with the RCBS Rebel
After extensive use, the Rebel’s character becomes clear. For a deeper dive, check out our full rcbs rebel analysis.
Pros and Cons in the Real World
Pros: The lack of frame flex is immediately apparent, especially during bullet seating and crimping. The primer system is genuinely mess-free. The handle throw is efficient, offering great mechanical advantage. It feels like a press that will outlast you.
Cons: It’s heavy and not easily moved if you didn’t plan for a permanent spot. The price point puts it in direct competition with other flagships. Speaking of which…
RCBS Rebel vs Rock Chucker: A Natural Question
The RCBS Rebel vs Rock Chucker debate is common. The Rock Chucker is the legendary standard. The Rebel is its evolution. The Rebel offers a more modern primer system, a slightly different linkage feel, and that one-piece frame. The Rock Chucker has decades of proven track record. You can’t go wrong with either, but the Rebel represents the current engineering peak from RCBS.
Answering Common Questions
Can I use it for swaging? Yes, its rigid frame makes it suitable for moderate swaging tasks, but always consult specific die instructions.
Is the primer arm universal? It uses the standard RCBS primer arm, so replacements and upgrades are easy to find.
Best bench design? An L-shaped bench with the Rebel on the strong, short side is ideal. The long side holds your case prep, scale, and components.
Mounting the RCBS Rebel isn’t just a first step; it’s the most critical step. A press of this caliber demands a foundation that matches its integrity. Invest the time in proper through-bolting, respect the requirements for bench top thickness and weight, and dial in your ergonomics. Do that, and the Rebel will reward you with a lifetime of precise, effortless reloading. The difference between a good press and a great press is often just a few bolts and a well-built bench.